Benvinguts! Wellcome!

Ja fa tres anys que a l'Escola Rocaprevera vam iniciar el Projecte Arts. Els alumnes de 3r, 4t, 5è i 6è de primària reben les classes d'Educació Visual i Plàstica en llengua anglesa. Engrescats pels bons resultats obtinguts, aquest curs l'hem començat a introduir a l'ESO.
Aquest bloc pretén ser un recull dels treballs més significatius realitzats pels alumnes, des de 1r de Primària fins a 4t d'ESO.
El nom del nostre bloc és un petit homenatge al gran pintor Vincent Van Gogh i a la seva extraordinària obra. Com podeu observar, el fons també està inspirat en les creacions de Gustav Klimt.
Es mostren els missatges amb l'etiqueta de comentaris 2n ESO. Mostrar tots els missatges

divendres, 6 de juny del 2014

PERSPECTIVE DRAWING. 2nd ESO


Perspective drawing is a technique used to represent three-dimensional images on a two dimensional picture plane. When we want to draw a real object in a paper we try to represent the depth in a flat surface. This surface has only two dimensions, while the object has three dimensions. How can we do it? The answer is: using perspective.

Perspective is to painting what the bridle is to a horse, the rudder to a ship... There are three aspects to perspective. The first has to do with how the size of objects seem to diminish according to distance; the second, the manner in which colours change the farther away they are from the eye; the third defines how objects ought to be finished less carefully the farther away they are” (Leonardo da Vinci).


Look at the image and verify Leonardo’s observations:
  • Do all the objects seem to diminish according their distance to the viewer?
  • Do the colours change the farther they are from the viewer’s eye?
  • Do the objects less accurate the farther they are?
Picture 1


Look at  picture 2. It shows the linear perspective of the image above. Pay attention at the next points:

  • All the lines join in a point called over the horizon line. This point is called vanishing point.
  • Shapes appear smaller the farther they are.
  • The horizon line appears at the same height that our eye-level.

    Picture 2

    Perspective was developed in the 15th Century by architects. For 500 years, perspective remained one of the basic principles of Western art, until it was challenged by the ideas of the Cubists (for example Picasso) at the start of the 20th Century.
    Knowing and understanding perspective is an essential tool to help anyone improve their drawing technique.

    There are two main elements in perspective drawing:
  • Linear perspective: organizes shapes in space
  • Aerial perspective: atmospheric effects on tones and colours.

We are going to practise linear perspective.


THE HORIZON AND THE EYE LEVEL

The horizon and the eye level are the axis around which a perspective drawing is constructed.
When we are outdoors, we use the horizon as a point of reference to judge the scale and distance of objects in relation to us.
In perspective drawing, the horizon has to be the viewer’s eye-level.

Look at the next pictures to explore the value of horizon and eye level.
Picture 3
In picture 3, note how all four figures share the same eye level (it’s the same than the horizon line). This suggests that they are all the same height and are standing on the same plane (on the floor). It also suggests that the figures are the same height as any viewer of the picture. As a result, the organisation of scale and distance in the drawing makes good visual sense.

Picture 4
 
In picture 4, although the figures are still the same size than in picture 1, their eye levels don’t have any relationship to the eye level of the picture. As a result, the scale of the figures is totally confused.

This demonstrates the importance of the horizon/eye level to the organisations of scale and distance in a perspective drawing. It also illustrates the meaning of Leonardo’s words “Perspective is to painting what the bridle is to the horse, the rudder to a ship”.

ONE POINT PERSPECTIVE

One point perspective uses a single vanishing point to draw an object. It is the simplest form of perspective drawing, and is the perspective we are going to work with.

Look at the next picture:

Picture 5 

 
One point perspective has been used to draw a box.

Vanishing points are dots on the eye-level where parallel lines seem to converge and disappear. One point perspective has only one vanishing point. You can see clearly the vanishing point in picture 2.

dilluns, 12 de maig del 2014

APPLIED GEOMETRY: SCRAPBOOK POLYHEDRON. 2nd ESO

We have been practising Technical Drawing for some weeks. I know that this part of the subject is difficult, and many of you find it the most boring thing in the world!

As we have drawn lots of polygons, I've thougth it could be a good idea to build 3D polygons. In geometry, they are called polyhedra (polyhedron in singular).

Polyhedra are beautiful 3D geometrical figures that have fascinated philosophers, mathematicians and artists. There are hundreds of polyhedra paper models on this site. And more here.


Our activity will be building a scrapbook icosahedron.  You will find detailed instructions here.

Material required
  • Coloured cardboard
  • Geometric compass
  • Pencil and rubber
  • Scisors
  •  Ruler
  • Glue
You also can follow the instructions given in the next video:


This activity is inspired in Mayalen's "Bola para regalo"

dijous, 24 d’octubre del 2013

CREATING A VOKI

A Voki is an animated icon.  It moves itself and speeches, reading a text you have introduced before.  We can use a Voki as a personal image, adding it to our blog or webpage.
First step to create a Voki is going to the webpage http://www.voki.com.  You need to sign up (register).  Next, go to "Create" and you'll be able to start. Many of the images are free, but some of them must be paid (they wear a hat).


There is a tutorial which explains how to do it step by step (in Catalan):
You also can watch this video (in English), that explains clearly the process:

Activity

Create your own Voki.  Please, choose a free human character (not a pet or anything else).  Your Voki should represent yourself ( how you look like now or you want to be in the future).  The background can contain your hobbies or favourite places.  Give it a voice in English using your tab.  Please, be polite.

Send the result to the teacher's e-mail.

Enjoy it!

dijous, 26 de setembre del 2013

POSTCARDS FROM YOUR TOWN. 2nd ESO

Our new project consists on creating a collection of postcards from our town.
Postcards should be up-to-date and attractive designed. To achieve our goal we are going to use  Online Photo Editors.

We are going to start practising with some photo editors that let apply photo effects such as painting, converting into a drawing, an oilpainting or an old picture.

You will find these photo editors here.

Postcards from our town, step by step

  1. Think about significant places or monuments in Torelló, for example buildings, churches, squares, streets...
  2. Get a camera and take photos of your theme. Try to be original and to use different points of view.
  3. Choose the photo you think it is the best one.
  4. Apply some photo effects using any online photo editor we have been practising with.
  5. You can also add some text (for example, the name of your theme).
  6. The result should be as attractive as a postcard you could find in a souvenirs shop.
  7. Send the result to the teacher by e-mail.

Remember:  this is an individual work!

I hope you enjoy it!


dijous, 12 de setembre del 2013

CREATE YOUR OWN MOVIE CHARACTER. 2nd ESO

When we read a story, we imagine characters in a different way that other people do.
It happens the same with movies.  Every director creates his own characters to tell the story.  And if two different directors shoot the same story, we can be sure that the results will be quite different.

Do you remember Cruella de Vil, the evil woman in "101 Dalmatians"?  She was drawn by Walt Disney in 1961.

In 1996, Glenn Close was the actress chosen to represent her in a film.
But in 1984 the famous artist Keith Haring painted his own Cruella:


 All of them are different, but they have also some things in common.

Now you have the chance to customize your own character. 

Activity


  1. Choose your favourite film - not a cartoon.
  2. Choose a character of the film that you especially like or dislike.
  3. Draw a version of your character.  It must be your version, nor a copy of the original character.  It should be your interpretation of the character.
  4. Write the tittle of the film and name of the character in a corner of the cardboard.
  5. Material needed:  DIN A4 cardboard (half a DIN A3) and felt-tipped pens.
This activity is inspired by Plástica práctica.

NEW SCHOOL YEAR INSTRUCTIONS. 2nd and 3rd ESO

Here we are again.  After the Summer break we start a school year full of changes.

We meet again practising "Educació Visual i Plàstica". I hope we enjoy the subject together.   I'm sure we will!


You can read the 2013-2014 school year instructions here.

Have a good School Year!

dimarts, 2 de juliol del 2013

STUFF TALES PROJECT: VIDEOS READY!

El projecte "Stuff Tales" ja té alguns vídeos a punt.  No tots, però.  Hem tingut dificultats tècniques i també de manca de material (només disposàvem de 2 càmeres domèstiques i una va dir prou al cap d'uns dies).  També hem de dir que el projecte s'ha allargat massa en el temps (ens ha ocupat 2 trimestres sencers!), cosa que les darreres setmanes ha provocat bastant de cansament en els alumnes i un xic de desmotivació.

De moment, només us podem penjar 2 vídeos: Goldilocks (Rínxols d'Or) i Alice in Wonderland (Alícia al país de les meravelles).  A mesura que ens en vagin arribant, us els anirem mostrant.

Per cert, el dijous 4 de juliol s'inaugura al Centre d'Arts Contemporànies de Vic l'exposició que mostra tots els treballs participants en el projecte Art i Escola 02.

Aquí  teniu els contes.  Disfruteu-los!

Stuff Tales Project has some videos ready.  But not all of them.  We have had some technical difficulties, also lack of material (we had only 2 domestic cameras available, and one of them broke after a few days).  The project has been so long (we've been working in it for 2 whole trimesters!), and the last weeks students were so tired and demotivated.

By the moment, we only can share 2 movies: Goldilocks and Alice in Wonderland.  If we receive more, we're going to show you them.

Next Thursday 4th July Centre d'Arts Contemporànies de Vic opens an exhibition showing all the Artworks included in Art i Escola 02 project.

Here they are.  Enjoy them!


Podeu veure l'activitat completa aquí.

Have a look at the complete activity here.

dilluns, 3 de juny del 2013

EL PROJECTE "STUFF TALES PROJECT" A LA UNIVERSITAT DE VIC! 2n ESO

El passat dimecres 29 de maig, els alumnes de 2n ESO van presentar el seu treball "Stuff Tales Project" a l'aula magna de la Universitat de Vic, en el marc de les presentacions dels projectes d'Art i Escola 02.

La Marta, la Mireia, la Laura i en Mark van confegir un Prezi on s'explicava l'evolució del projecte, des de la seva creació fins al moment actual, quan ja hem enregistrat la majoria dels contes i estem començant la fase d'edició.
L'auditori era ple d'alumnes d'altres escoles i instituts de la comarca que, com nosaltres, presentaven el seu treball.

Us deixo unes fotografies de la jornada.


Si en voleu veure més cliqueu aquí.

Ja ens falta poc per tenir els vídeos a punt.  Esperem poder-los acabar abans de final de curs!

dilluns, 7 de gener del 2013

QUEREMOS MUSICARTE

"QUEREMOS MUSICARTE", un interessant projecte per als professors d'Educació Visual i Plàstica i Música:

STUFF TALES PROJECT. 2n ESO

We start the 2nd Term with a new project.  I've called  it "Stuff Tales Project" because we're going to film fairytales made with stuff.

Do you remember the work we did last year emulating Hanoch Piven?  We tried to do creative portraits using different kinds of stuff.
The Stuff Tales Project is inspired on another Hanoch Piven's work.  Did you know that he illustrated some fairy tales in the TV program "Una mà de contes"?  Here you have one of them:"Tatxí-Tatxó i la draga Draga"


Hanoch Piven has also cooperated in other tales. One of them, “Un autoretrat?”, tells the story of a boy with TDAH.  That tale was filmed because of La Marató de TV3 in 2008.  You can find it here.  And this is its story script.

Here bellow, there are more stories illustrated by Piven.  You can get some inspiration from them:


They are really very creative and different from the stories we use to watch on TV.

OUR PROJECT

The aim of the project is to shoot and edit a short movie,  and show it to the students in 1st and 2nd Primaria. These are the instructions:

1. Work in groups (3-4 people)
2. Watch some of the Hanoch Piven's movies to get inspired

3. Choose a classic fairy tale.  It must be an easy, not very long story, because it will be explained to the students in 1st and 2nd Primaria.  Here you have some useful links:
Storynory: Fairytales from Brothers Gimm, Perrault, Andersen...  You can listen to the audio and read the transcription of the story.
-  Grimm's Fairytales: 209 written tales collected by Brothers Grimm.
 
Fables, fairytales and stories: fables from Aesop, Collodi, Andersen, Brothers Grimm and Lewis Carroll.
Written short stories with audio: they are classified by age.
- You can also choose a tale in catalan, but you'll have to translate it, of course!


Before doing anything, you must share your choice with your teacher.

4.  Tale's screenplay or script. It must contain:

  • Characters
  • Dialogues
  • Stuff needed
  • Voic-over/ narrator
  • Music
  • Remember this should be a short movie (maximum lenght 8 minutes)
    You can read the story scripts of “Una mà de contes” in the web page. Perhaps they can be used as a model. The same with the tale chosen: the teacher must know any part of the script before start shooting.

    5. Shooting: filming the movie and recording the voices and dialogues. We will need a video camera and a microphone.
    6. Editing.
    7. Showing.


    Of course, you can ask me any question. If you need, you can write a comment in the blog.
    I think it'll be a nice work to do! So, let's start!


    Good luck!


      dilluns, 17 de desembre del 2012

      POP-UP CHRISTMAS CARD. 2nd ESO

      After some weeks working in calendars, we're going to finish the term making a pop-up Christmas card.  I took it from Robert Sabuda's webpage and made some changes, mainly cutting some stars and using coloured cardboard.

      HOW TO DO IT


      1.  Download the templates and print them onto heavy paper or cardboard.


      2.  Cut and fold as instructions show.

      When you finish, the card will be something like this:

      MERRY CHRISTMAS!

      dimarts, 11 de desembre del 2012

      DECORACIÓ DE NADAL

      Finalment, després de bastantes setmanes de feina, hem penjat la decoració nadalenca que aquest any ha preparat cada escola de Torelló. 

      Us faig cinc cèntims del procés.
      A mitjans d'octubre l'ajuntament va reunir les escoles del poble per tal d'encarregar-nos la decoració d'una plaça.  Quin encàrrec!, vam exclamar tot el claustre en pes.  Sí, es tractava d'escollir una de les places del poble i, utilitzant materials reciclats, fer-ne la decoració nadalenca.  Una feinada, sí senyor, que no havíem planificat de cap manera, s'immiscuïa enmig del curriculum i havíem d'enllestir en menys de 2 mesos.

      Com que l'any passat havia construit unes cortines de taps amb els alumnes de 4t d'ESO, vaig suggerir que podríem utiltizar la mateixa tècnica per simular una nevada de taps blancs i blaus.  Es tractava de convertir la plaça en un paisatge d'hivern, nevat o glaçat.  Es va proposar muntar arbres de nadal amb materials reciclats, i l'Àngels va fer una tasca increïble de cerca de models per internet (beneïda xarxa!).

      Pel que fa a la ubicació, en un principi ens havíem decidit per la Placeta d'en Pujol (altrament coneguda com a plaça dels taxis), però després de consultar-ho amb el coixí vam declinar la idea, ja que ens arriscàvem a ser envaïts per la xurreria ambulant (mai absent en aquestes dates) i pel campament reial del 5 de gener.

      En una primera inspecció ocular, la comissió que es va formar (l'Àngels, l'Anna, l'Esther, la Jordina i jo, i perdoneu si m'oblido d'algú), va confirmar que la Placeta no s'adeia amb els nostres objectius i, tot rumiant com penjaríem la pluja de taps dels porxos de la segona opció, la Plaça Vella, vam descobrir la infrautilitzada Plaça de Mn. Cinto Verdaguer, amb una magnífica farola plantada al mig que faria les delícies de les nostres cortines.

      A continuació calia començar a recollir material.  Ampolles, garrafes, taps de tota mena...  Hem d'agrair la col·laboració de les famílies, que ens van literalment colgar de plàstic.  Un dels pares de l'AMPA, que és fuster, va construir les estructures de fusta que seríen els esquelets dels arbres.  I apa, vinga, a passar estones al taller enfilant taps i enfilant ampolles.  Tothom ha tingut feina, des dels més menuts d'Infantil fins als de 4t d'ESO.

      Finalment, ha arribat el matí gèlid de l'11 de desembre.  Teníem la brigada municipal a la nostra disposició (amb grua inclosa) per procedir al muntage.  Ens hem passat tot el matí lligant els fils de les cortines (maleïts embolics!) i muntant els arbres.  Quin fred que hem passat!

      El resultat final, com podeu comprovar, és espectacular.  Estem més que orgullosos de la feina feta.  I el millor de tot és que hem compartit estones amb les i els alumnes, les mares i els pares, mestres i professors:  HEM FET ESCOLA.

      ENHORABONA A TOTHOM!
      I BONES FESTES!


      dilluns, 15 d’octubre del 2012

      PHOTO EFFECTS ONLINE. 2nd ESO

      There are some photo editors online that let apply photo effects, edit, enhance, filter pictures and photos.

      BEFUNKY
      Free photo editor online.  Very easy to use, with no signup necessary.  You can upload and save your pictures in your computer.  The picture can be converted in a drawing, an oilpainting, and old photo, a cartoon...  Hundreds of possibilities!


      In the left side there is a menu with all the options:  edit, effects, artsy (art effects), frame, text and goodies. Going to effects, you can transform the picture in a black and white drawing (B&W), a charcoal drawing, change the colours, apply pop-art style, etc.


      For example, we can apply "old photo" in "effects":

       The result could be such as this:


      Or if we apply "charcoal":

      You can also try to transform a selfportrait and you're going to get something like that:

      divendres, 7 de setembre del 2012

      4, 3, 2, 1... GO!

      Abans de començar el curs, i vist el panorama desolador que s'albira per a les Arts en els canvis en la llei d'educació que proposa el ministre Wert, penjo aquest pòster que he trobat al blog de Lucía Alvarez, Las Tic en Plástica. Es titula "Learn to think like an artist" i està fet per 4Cats Art Studio.


      dimarts, 24 d’abril del 2012

      TRAÇATS GEOMÈTRICS BÀSICS. 2n ESO

      Vés a la pàgina:
      http://www.educacionplastica.net/trazbas.htm#tra
      Repassa el traçat de:
      • la mediatriu d'un segment
      • la bisectriu d'un angle
      • la recta perpendicular per un punt P a una recta r
      • la suma d'angles
      • la diferència d'angles
      • la circumferència que passa per tres punts
      De cada apartat, fes l'exercici per enviar al professor i envia-me'l a l'adreça següent: eviprocaprevera@gmail.com

      dilluns, 16 d’abril del 2012

      RESULTATS D'AUTORETRAT AMB HISTÒRIA. 2n ESO

      La darrera activitat del segon trimestre, l'Autoretrat amb història, us ha resultat bastant dificultosa.  Les llistes en què us havíeu de basar per definir la vostra identitat (identitat a partir de l'estil, identitat a partir dels objectes i identitat a partir d'un mateix) es van limitar a qüestions molt superficials.  La majoria de vosaltres us vau quedar amb els amics, la mascota i poca cosa més.  A mi m'hauria agradat que haguéssiu aprofundit una mica més en el que sou i que haguéssiu estat capaços de mostrar-ho amb més força i creativitat, utilitzant tots els materials que us vaig proporcionar i els que haguéssiu pogut imaginar.  Tot i això, he de dir que els treballs resultants us fan justícia, és a dir que us representen ben bé a cadascú de vosaltres.
      Cal destacar que alguns de vosaltres heu fet una bona feina, amb fotografies originals i divertides que han donat lloc a uns treballs bastant correctes.
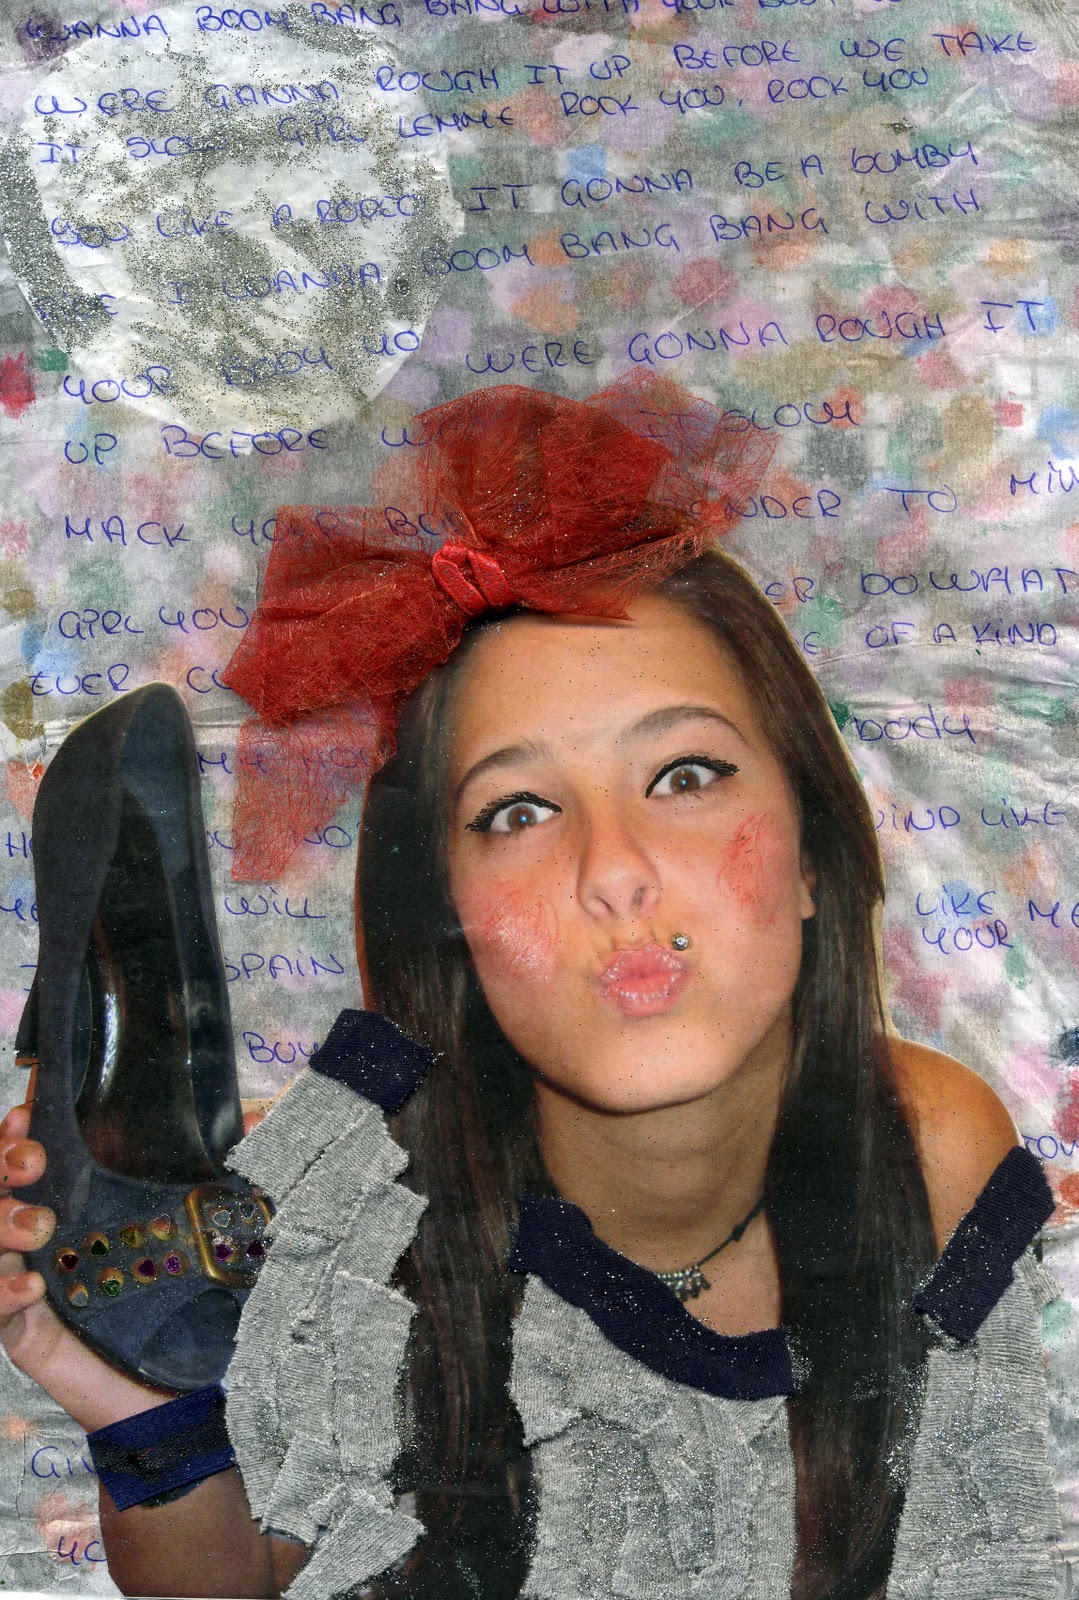
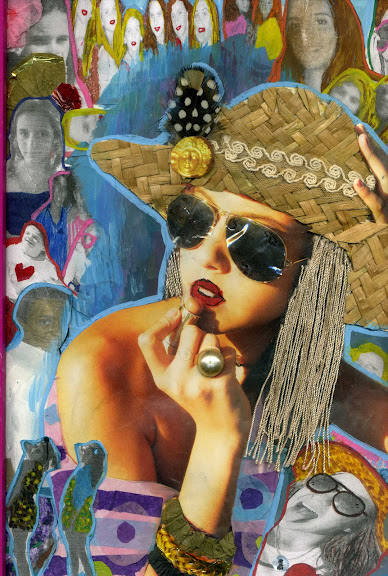
      Aquesta vegada no penjo tots els treballs, sinó que n'he escollit uns quants, els que m'han semblat més elaborats i significatius.

      dilluns, 27 de febrer del 2012

      AUTORETRAT AMB HISTÒRIA. 2n ESO


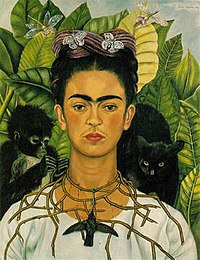
      Les imatges ens poden explicar moltes coses.  Hi ha artistes que han utilitzat les seves obres per parlar d'ells mateixos i de la seva història.  Aquest és el cas de Frida Kahlo, una pintora mexicana que utilitzava la simbologia de les imatges per mostrar la seva vida i el seu sofriment. 
      Frida Kahlo - Autoretrat amb collaret d'espines

      L'objectiu d'aquesta activitat és explicar qui som cadascú de nosaltres a partir de les imatges.  Per això l'anomenarem "Autoretrat amb història".  Aquesta activitat està basada en l'activitat anomenada "Un trocito de mi historia"  del fantàstic bloc Educación Plástica con Mayalen , de Mayalen Piqueras.

      Farem el següent:
      1.  Veurem el documental "Frida Kahlo, vida y tiempos" per tal de familiaritzar-nos amb la història d'aquesta genial pintora. 
      2.   En el web "Los fans de Frida" podrem veure les seves obres i comprendre el seu significat.
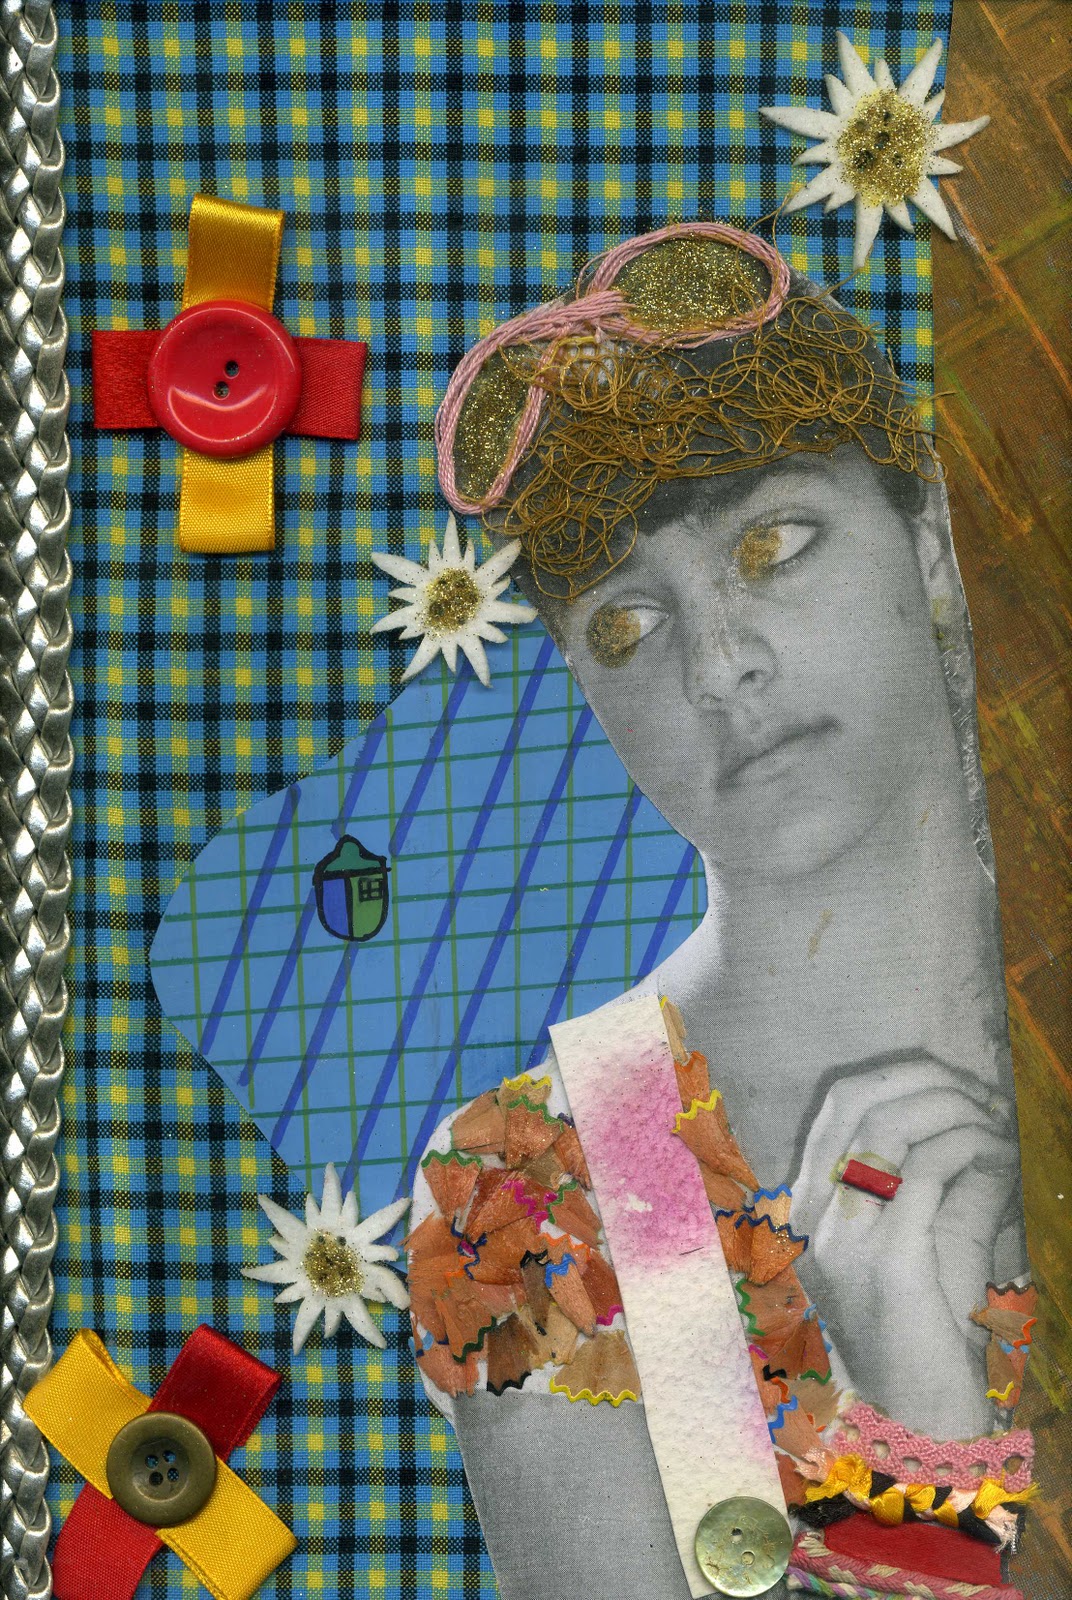
      3.  Activitat plàstica "Autoretrat amb història":  es tracta de realitzar un autoretrat utilitzant una fotografia i diferents elements plàstics en forma de collage que ens ajudin a saber qui ets i com ets.  Abans de començar a retallar i pintar et caldrà PENSAR en tu mateix i la teva identitat.  Per fer-ho, hauràs de fer 3 llistes amb les teves característiques:
        1. Identitat a partir de l'estil: colors que t'agraden, roba (hippy, pijo, gòtic...), estils musicals (hip-hop, punk, heavy, rocker,...)
        2. Identitat a partir dels objectes: els objectes més importants en la teva vida: mascotes, estris electrònics (ordinador, telèfon mòbil), instruments musicals, esports, llibres, llocs, habitacions, banderes, hobbies...
        3. Identitat a partir d'un mateix: com ets físicament (color de la pell, del cabell, textura del cabell, colors dels ulls, ...), els teus desitjos, les teves il·lusions...
      Aquestes llistes t'ajudaran a seleccionar el que t'agradaria ensenyar de tu en l'autorretrat.
      Quan tinguis les tinguis, serà l'hora de pensar en la foto sobre la qual treballaràs.  La foto l'hauràs de fer a casa i portar-la impresa a la classe següent.  Ha de ser una foto que digui molt de tu, per tant, PENSA en: l'enquadrament, la postura que agafaràs, la mirada, la roba que portaràs, el pentinat, etc, etc, etc.

      Aquí tens unes mostres per inspirar-te, extretes del bloc de Mayalen Piqueras i realitzades pels seus alumnes de 2n d'ESO:


      dijous, 23 de febrer del 2012

      Henri Matisse: FENETRE À COLLIOURE. 2n ESO

      A 2n d'ESO hem estat treballant el color. Com a exercici pràctic hem volgut reproduir l'obra d'Henri Matisse "Fenêtre à Collioure" utilitzant ceres. Matisse fou un dels creadors del Fauvisme, un moviment pictòric expressionista nascut a principis del segle XX a França. Els Fauvistes ("fauve" vol dir bèstia salvatge en francès) utilitzaven la força del color per donar expressivitat a les seves pintures.

      Aquí podeu veure el resultat del treball dels nois i noies de 2n d'ESO.  Felicitats per la feina feta!