Ja fa tres anys que a l'Escola Rocaprevera vam iniciar el Projecte Arts. Els alumnes de 3r, 4t, 5è i 6è de primària reben les classes d'Educació Visual i Plàstica en llengua anglesa. Engrescats pels bons resultats obtinguts, aquest curs l'hem començat a introduir a l'ESO. Aquest bloc pretén ser un recull dels treballs més significatius realitzats pels alumnes, des de 1r de Primària fins a 4t d'ESO.
El nom del nostre bloc és un petit homenatge al gran pintor Vincent Van Gogh i a la seva extraordinària obra. Com podeu observar, el fons també està inspirat en les creacions de Gustav Klimt.
A Voki is an animated icon. It moves itself and speeches, reading a text you have introduced before. We can use a Voki as a personal image, adding it to our blog or webpage.
First step to create a Voki is going to the webpage http://www.voki.com. You need to sign up (register). Next, go to "Create" and you'll be able to start.
Many of the images are free, but some of them must be paid (they wear a hat).
There is a tutorial which explains how to do it step by step (in Catalan):
You also can watch this video (in English), that explains clearly the process:
Activity
Create your own Voki. Please, choose a free human character (not a pet or anything else). Your Voki should represent yourself ( how you look like now or you want to be in the future). The background can contain your hobbies or favourite places. Give it a voice in English using your tab. Please, be polite.
El Linogravat o gravat sobre linòleum (linocut en anglès) és una tècnica d'impressió que utilitza plaques de linòleum com a suport.
El linòleum és un material que fa uns anys s'utiltizava per aïllar el sòl dels pisos. Es tracta d'una pasta feta de resines, suro i oli de lli que es diposita sobre una tela d'arpillera i es deixa assecar en forma de planxa.
Aquestes planxes es treballen tallant-les i buidant-les mitjançant gúbies, de manera que la imatge que gravarem queda en relleu i el fons queda rebaixat.
Després de tallar s'entinta amb un corró, de manera que la tinta mulla només les parts que no hem rebaixat. En aplicar-ho per estampació sobre un paper, les parts entintades reproduiran el dibuix.
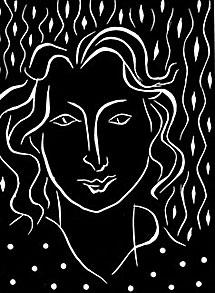
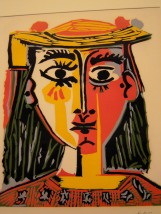
Aquesta no ha estat una tècnica molt emprada pels artistes, però podem destacar algunes obres de Picasso i de Matisse:
Picasso - Natura morta (1962)
Henri Matisse - Primavera
El linogravat és una tècnica de certa complexitat, sobretot per la dificultat de gravar les planxes de linòleum. Podem escalfar una mica les planxes (per exemple, posant-les sobre un radiador) i no ens costaran tant de tallar. Cal anar amb compte amb les gúbies, que són bastant esmolades. Vigileu de no posar mai els dits al seu davant!
També cal estar alerta a l'hora de fer el
dibuix: hem de tenir molt clar que les parts rebaixades i tallades
quedaran blanques, i la resta en color. Per això, abans de començar, és
recomanable fer un esbós del que volem que sigui el resultat.
Tot i la dificultat, podem aconseguir resultats excel·lents:
Pat Snyder - The Hub
Chris Pig - Lorenzo
A continuació us deixo un vídeo explicatiu sobre la tècnica del linogravat:
Cubism was a truly revolutionary style of modern art
developed by Pablo Picasso and Georges Braque. It was the first style
of abstract art which evolved at the beginning of the 20th century in
response to a world that was changing very quickly.
Cubist Artists tried to change conventional forms of representation, such as perspective. Their aim was to develop a new way of seeing which reflected the modern age.
The Cubists introduced collage into painting, and they were influenced by art from other cultures, specially African Masks.
Pablo Picasso - Horta de Sant Joan (oil on canvas, 1909)
Georges Braque - Landscape in l'Estaque (oil on canvas, 1908)
Juan Gris - Le Canigou (oil on canvas, 1921)
Try to learn more about Cubism in Artyfactory.com
You can also test your knowledges about Cubism here.
COLLAGE
Collage is an art technique where the artwork is made from an assemblage of different forms, thus creating a new whole.
Collage can include different materials as newspapers, coloured papers, photographs, texts, and also fabric or any kind of object, all them glued to a piece of paper or canvas.
The word "collage" means "to glue" ("coller" in French means "glue"), and was invented by George Braques and Pablo Picasso in the beginning of the 20th Century. It became an important part of Modern Art.
I'm sure you've done a lot of collage artworks at school, haven't you?
Ok, we can start our work watching the next video (in Spanish):
And we can practise online collage using these multimedia aplications:
It's time to talk about one of the most important artist in Art History. He was a Spanish painter, he was born in Malaga in 1881 and his name was Pablo Ruiz Picasso.
As you've read above, he was one of the first Cubists, and he also developed collage techniques.
His Artwork includes different Art Periods:
Picasso - The Pan Pipes (1923)
Early times (before 1901)
Blue Period
Rose Period
African-influenced Period
Cubism
Classicism and Surrealism
Later works
Can you find an example of any Period in the Internet? Paste the pictures into a powerpoint . It should show the next information:
1st slide: Tittle: Picasso's Art Periods. Autor (your name)
2nd slide: Tittle: Early times. Image: a picture from Picasso's early times artwork. Under the picture, write the name of the artwork.
3rd slide: Tittle: Blue Period. Image: a picture from Picasso's Blue Period artwork. Under the picture, write the name of the artwork.
Us deixo un vídeo fet per en Fede de 4t d'ESO en el qual mostra tot el procés de disseny de la samarreta que cada any els de 4t venen per finançar el seu viatge de fi d'estudis.
Enhorabona, Fede!
We start the 2nd Term with a new project. I've called it "Stuff Tales Project" because we're going to film fairytales made with stuff.
Do you remember the work we did last year emulating Hanoch Piven? We tried to do creative portraits using different kinds of stuff.
The Stuff Tales Project is inspired on another Hanoch Piven's work. Did you know that he illustrated some fairy tales in the TV program "Una mà de contes"? Here you have one of them:"Tatxí-Tatxó i la draga Draga"
Hanoch Piven has also cooperated in other tales. One of them, “Un autoretrat?”, tells the story of a boy with TDAH. That tale was filmed because of La Marató de TV3 in 2008. You can find it here. And this is its story script.
Here bellow, there are more stories illustrated by Piven. You can get some inspiration from them:
They are really very creative and different from the stories we use to watch on TV.
OUR PROJECT
The aim of the project is to shoot and edit a short movie, and show it to the students in 1st and 2nd Primaria. These are the instructions:
1. Work in groups (3-4 people) 2. Watch some of the Hanoch Piven's movies to get inspired
3. Choose a classic fairy tale. It must be an easy, not very long story, because it will be explained to the students in 1st and 2nd Primaria. Here you have some useful links:
- Storynory: Fairytales from Brothers Gimm, Perrault, Andersen... You can listen to the audio and read the transcription of the story. - Grimm's Fairytales: 209 written tales collected by Brothers Grimm.
- Fables, fairytales and stories: fables from Aesop, Collodi, Andersen, Brothers Grimm and Lewis Carroll. - Written short stories with audio: they are classified by age. - You can also choose a tale in catalan, but you'll have to translate it, of course!
Before doing anything, you must share your choice with your teacher. 4. Tale's screenplay or script. It must contain:
Characters
Dialogues
Stuff needed
Voic-over/ narrator
Music
Remember this should be a short movie (maximum lenght 8 minutes)
You can read the story scripts of “Una mà de contes” in the web page. Perhaps they can be used as a model. The same with the tale chosen: the teacher must know any part of the script before start shooting.
5. Shooting: filming the movie and recording the voices and dialogues. We will need a video camera and a microphone. 6. Editing. 7. Showing. Of course, you can ask me any question. If you need, you can write a comment in the blog. I think it'll be a nice work to do! So, let's start! Good luck!
All the images around us (drawings, pictures, paintings, publicity images...) are formed by the basic elements of visual language: dots, lines, shapes, texture and colour.
We start talking about dots, and we are going to practise using an awesome technique: Pointillism.
Deixem el dièdric i comencem la Perspectiva Axonomètrica o Axonometria. Us deixo els apunts que us he passat i uns enllaços que ens ajudaran a comprendre millor aquest Sistema de Representació.
There are some photo editors online that let apply photo effects, edit, enhance, filter pictures and photos.
BEFUNKY
Free photo editor online. Very easy to use, with no signup necessary. You can upload and save your pictures in your computer. The picture can be converted in a drawing, an oilpainting, and old photo, a cartoon... Hundreds of possibilities!
In the left side there is a menu with all the options: edit, effects, artsy (art effects), frame, text and goodies. Going to effects, you can transform the picture in a black and white drawing (B&W), a charcoal drawing, change the colours, apply pop-art style, etc.
For example, we can apply "old photo" in "effects":
The result could be such as this:
Or if we apply "charcoal":
You can also try to transform a selfportrait and you're going to get something like that:
Exercicis d'obenció de vistes de peces 3D. Per fer-los necessiteu instal·lar el Java Run time Environment. HI ha dos nivells, l'elemental i el mitjà. Una vegada fets, la mateixa pàgina permet enviar-los al professor per e-mail. Sinó, també us els podeu descarregar en pdf.
Més exercicis: a la web laslaminas.es, trobaràs 6 làmines de vistes per a imprimir amb quatre peces cadascuna per a dibuixar alçat, planta i perfil.